
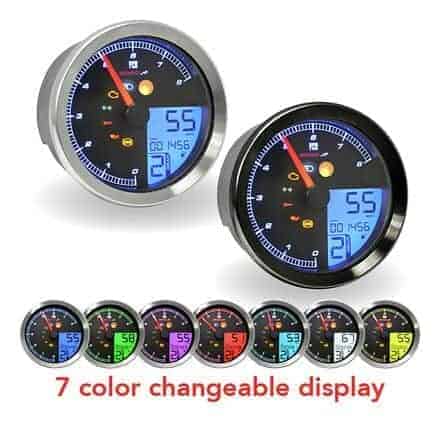
This guide was created for the Koso TNT-B since the manual that comes with the speedometer is really difficult to read through. This was originally written by a member of the bolt community and has been modified quite a bit and made available on the wiki in a better and more easily navigated format.
Features #
- Gear (based on rpm)
- Tachometer
- Speedometer
- Voltage
- Temperature
- Fuel trip
- Two utility trip odometers, these trip odometers go up to 10,000 before resetting, which is 10x the amount stock odometer allows for
- Service mileage trip
- Historical max value tracking
- Customizable backlight color and brightness
- Configurable warnings for speed, rpm, temp, & voltage
- Allows setting the displayed odometer reading so you keep same mileage. There is an internal odometer on the settings menu that however can not be changed and starts at 0 (zero) on install.
Usage
- Long-click (3 seconds, except where otherwise noted) or short-click on the Select button is used to adjust most all settings and navigate through menus.
- The Reset button now performs no functionality.
Tips
- Set tire percentage before performing gear learning.
- Regarding warning indicators: Regardless of what you set the warning light to do in submenu [LIG- A] be aware that in menu [WAr] you will get any configured warnings in submenus [SPEEd], [rpm], [tEMP], and [VOLt] via varying screen displays. You will also get a low fuel indicator no matter what warning indicators you have set up.
- In menu [WAr] under submenu [LIG- A] you can only set the warning light to work with one of the options. For example: If you want the warning light to come on once you hit a certain rpm you must long-click on rpm then short-click to choose how you want the light to react, then long-click to set. Then you must exit the menu while rpm is still the option that is shown. The warning light will only be associated with the option that is shown when exiting that menu.
Working Operation #
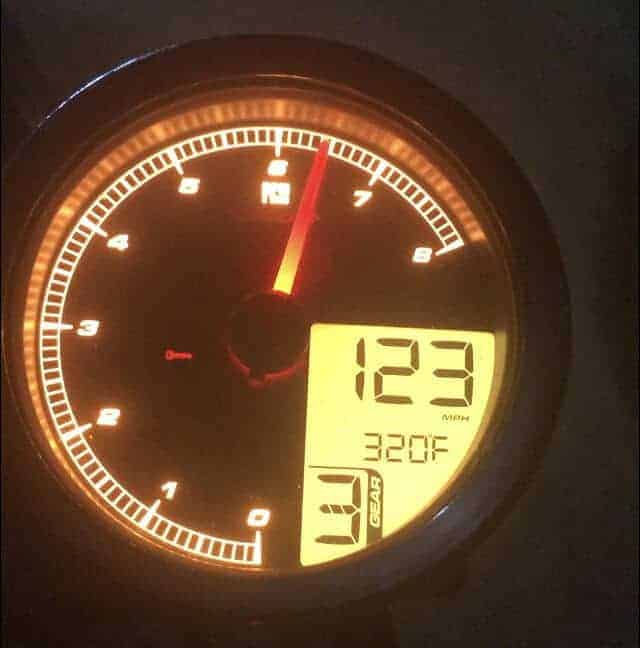
Main Screen
Short-clicking cycles through the following screens in the order below. The screen will typically default to last used screen when you start the bike. Exceptions are when your bike is throwing an error code or your Service Mileage is due.
Odometer #
The displayed odometer reading.
- Long-click to enter the Setup Menu
- Short-click to go to next screen
Trip A Screen #
A utility trip odometer to keep track of something like a trip or how many miles since last gas up.
- Long-click to reset the Trip A number
- Short-click to go to next screen
Trip B Screen #
A second utility trip odometer.
- Long-click to reset the Trip B number
- Short-click to go to next screen
Service Mileage Screen #
This screen counts down from the service mileage you have set in your service mileage settings. Once the trip mileage reaches zero it will continue to countdown in negative numbers to indicate you have passed your set service mileage. When mileage is surpassed this screen becomes a default screen on bike startup to further nag you to get your service done.
- Long-click for 8 seconds to reset the number after you perform your service
- Short-click to go to next screen
Clock Screen #
A digital clock.
- Long-click to enter clock adjustment screen (see setup menu for the clock for details on making changes in this adjustment screen)
- Short-click to go to next screen
Temperature Screen #
The running temperature of the bike, read from the head so it can read really hot.
- Short-click to go to next screen
Voltage Screen #
The voltage of the battery.
- Short-click to go to next screen
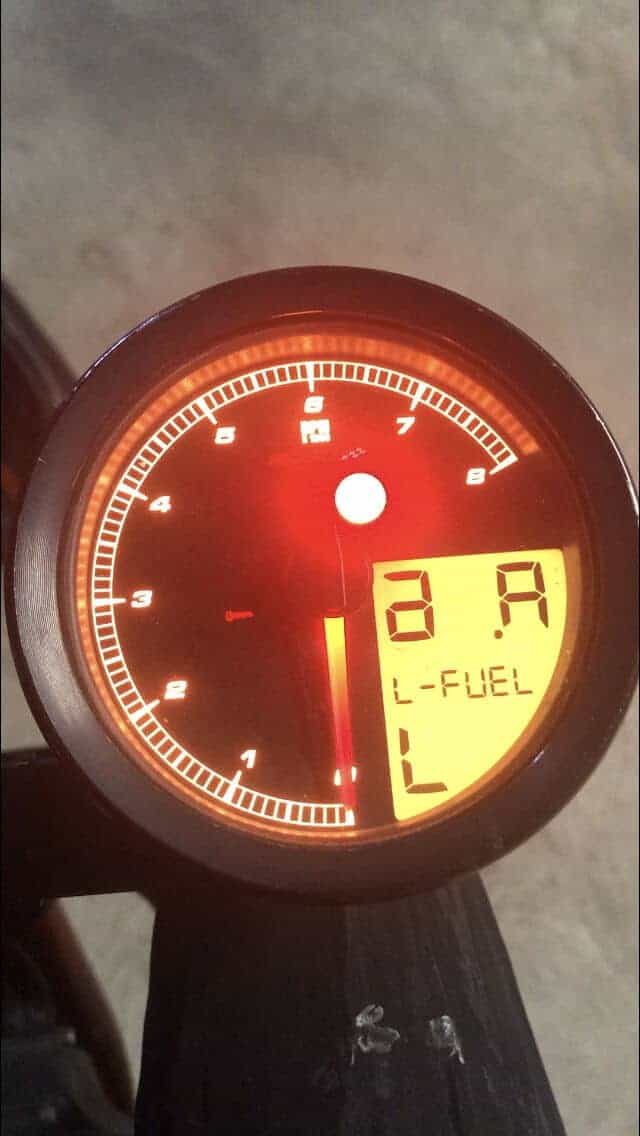
(Fuel Trip) #
This provides a count-up trip for when your fuel light comes on. This screen only shows up if you are low on fuel and the fuel sensor has actuated. It is not possible to access this screen without the fuel sensor actuating.
- Long-click to reset the number (generally you shouldn’t need to do this since fueling up the bike will normally reset this within a quarter a mile of resuming riding)
- Short-click to go to next screen
Max Screen #
Displays all the maximum values that have been displayed on the Koso speedometer in the past. The operation of this screen may come off as a little confusing to some people. It should be clear that the values displayed for each item on the screen did not necessarily occur at the same time. All values are tracked independently and are simply a display of the maximum the bike has ever reached for each item at any given time. Maximum Speed, maximum RPM indicated by the needle, maximum temperature, and the gear in which the maximum rpm occurred.
- Long-click to reset max recordings
- Short-click to cycle back around to the first Odometer screen
Setup Menu #
Main Screen
At the Odometer screen long-click Select to enter the Setup Menu. The Setup Menu can only be accessed when the bike is in neutral or the engine is not running.
Navigating the settings menu #
The general operation is to do the following within any given setting.
- Long-click to chose a value for adjustment or enter a menu
- Short-click to change the value you are adjusting
- Long-click to confirm the value and exit the adjustment
- Short-click to go to the next available setting or menu
- Repeat until you have set all values
- Upon setting the last value for a particular setting or menu the menu is exited
[CLOCK] Clock settings – a1 #
- Format: 12h/24h
- 12h
- Hour (__:00): 0-12, continue to cycle past 12 to also adjust AM/PM
- Minute (00:_0): 0-9
- Minute (00:0_): 0-9
- 24h
- Hour (__:00): 0-24
- Minute (00:_0): 0-9
- Minute (00:0_): 0-9
- 12h
[UNIt] Units of measurement – a2 #
- Displayed unit of measurement for both distance and speed: mph/kph
- Temperature: °F/°C
[ILL] Display illumination settings – a3 #
- Backlight Color: red, orange (Or), yellow, green, blue, light blue, purple, white
- Backlight Brightness: 1/5 (20%), 2/5 (40%), 3/5, (60%), 4/5 (80%), 5/5 (100%)
[tire] Tire Percentage – a4 #
This controls the speedometer based on the tire size essentially. If you have larger tires or change out pulleys the values could need to be adjusted here. Generally 63% is a working percentage for stock setups. Try that value and confirm with a GPS speedometer app, if correct great, if not adjust by 1% up or down and retest until you reach a correct reading.
- Percentage (_00%): 0-2
- Percentage (0_0%): 0-9
- Percentage (00_%): 0-9
Known tire percentages: 63% all stock setup; 64% with a 31 tooth front pulley or larger tires; 66% stock tire size, 31 tooth front pulley and 66 tooth rear pulley.
[GEAr] – Gear settings – a5 #
- Display the selected gear: ON/OFF
- [LEArn] Gear Learning Wizard: This is a wizard that lets you setup the gear indicator to read RPM’s and other factors to determine a best guess of what gear you are in and then show on the screen. Once setup it works well with a slight delay (<1 second) after a gear change.
- Long-click will exit back to the GEAr menu
- Short-clicking on this menu item will start the wizard
* You will need a good 5 seconds per gear and likely need a long enough straight-away of clear road for up to 30 seconds of total ride time at increasing speed to accurately “teach” the gears- Start riding when the display says “Go”
- Continue to follow prompts for upshifting
- After each upshift ride from low rpm of the prompted gear to high rpm at a fairly steady rate, repeat until you finish 5th gear
- A congratulations screen appears and all menus are exited
- Short-click at any time during the wizard to “Abort” if necessary
[WAr] Warnings – a6 #
Setup of warning notifications. There are a number of different warnings you can set up in this menu’s submenus.
[SPEEd] Speed Maximum – a.1 #
Set the speed in which you wish the speedometer to notify you that you are speeding. This will make the digital speed blink as you pass the set value. Also used as maximum value for the Light Trigger if you choose SPEEd as the value in a.A.
- Unit per hour (_00): 0-3
- Unit per hour (0_0): 0-9
- Unit per hour (00_): 0-9
[rpm] RPM Maximum – a.2 #
Set the maximum RPM you want to see before a warning. Some use this as a shift warning. When set this will make the digital gear indicator flash if you surpass the set RPM value. Also used as a value for the Light Trigger if you choose rPm as the value in a.A.
- RPM (0_000r): 0-8
- RPM (00_00r): 0-9
[tEMP] Temperature Warning – a.3 #
Sets the maximum temperature before you are warned. This is used as a value for the Light Trigger if you choose tEMP as the value in a.A, alternatively it will cause the Temperature screen to pop up and flash whenever you exceed the set value.
- °F
- Temperature (_00°F): 1-4
- Temperature (0_0°F): 0-9
- Temperature (00_°F): 0-9
- °C
- Temperature (_00°C): 0-2
- Temperature (0_0°C): 0-9
- Temperature (00_°C): 0-9
[VOLt] Voltage Warning – a.4 #
Sets the lowest voltage your bike is allowed to reach before you are warned. This is used as a value for the Light Trigger if you choose VOLt as the value in a.A, alternatively it will cause the Voltage Screen to pop up and flash whenever you go below the set value.
- Voltage (_0.0V): 0-1
- Voltage (0_.0V): 0-9
- Voltage (00._V): 0-9
[LIG- A] Light Alarm – a.A #
Set the trigger for the light. You may only set up one trigger.
- Trigger choice:
- L-FUEL: Low Fuel – Whenever the bike’s low fuel sensor trips
- S-Odo: Service Odometer – When the service is due and the service trip odometer has been surpassed, as set in the S-SEt menu
- t-GEar: Top Gear – When you are in 5th gear
- SPEEd: Max Speed – When the bike surpasses maximum speed as set in SPEEd setting
- rPm: Max RPM – When the bike surpasses maximum RPM as set in rPm setting, usually used as an indicator to remind the rider to shift
- tEMP: Max Temperature – When the bike surpasses the maximum temperature setting
- VOLt: Min Voltage – When the bike drops below the minimum voltage setting
- Light effect:
- L: Lit solid light
- S: Slow blinking light
- F: Fast blinking light
[S-SEt] Service Mileage – a7 #
The speedometer has a service odometer that tracks when your next service should be performed. Some may not like this feature so there is a toggle to enable/disable. You set the mileage in which your next service should be performed within this menu. Once the trip mileage reaches zero it will continue to countdown in negative numbers to indicate you have passed your set service mileage. When mileage is surpassed this screen becomes a default screen on bike startup to further nag you to get your service done.
- Enabled: ON/OFF
- Mileage (_0000): 0-1
- Mileage (0_000): 0-9
- Mileage (00_00): 0-9
[AbS] ABS – a8 #
Whether you have ABS brakes or not and if the setting should be on or off.
- Enabled: ON/OFF
[Odo] Odometer – a9 #
[total] Odometer total (internal) – a.1 #
This value is the total odometer reading since the odometer was installed. This cannot be changed. It is used to reduce falsification of the odometer records.
[Set] Odometer (external) – a.2 #
This value is what is displayed on your odometer display and can be changed.
- Mileage (_00000): 0-9
- Mileage (0_0000): 0-9
- Mileage (00_000): 0-9
- Mileage (000_00): 0-9
- Mileage (0000_0): 0-9
- Mileage (00000_): 0-9


